
Do you have an old, leaky, or just plain out-of-style kitchen faucet that's screaming for a replacement? Before you can bring in the new, you've got to deal with the old. Removing a kitchen faucet might seem like it requires professional help, but it's something you can tackle on your own. This guide will walk you through each step of how to remove a kitchen faucet without causing a flood under your sink.
Preparing for Kitchen Faucet Removal

Before you start removing your old kitchen faucet, it's crucial to prepare properly. This isn't a difficult job, but it does require some planning and the right tools.
A little preparation goes a long way in making the removal process smooth and stress-free. Let's dive into the essential steps to get you ready for this DIY project.
Gathering Your Tools
Having the right tools on hand is half the battle. For removing a kitchen faucet, you'll need a few key items:
- Basin wrench
- Adjustable wrench
- Screwdriver
- Flashlight
- Towel

A basin wrench is specifically designed to reach those tight spaces behind the sink and loosen the mounting nuts. An adjustable wrench and screwdriver will help with disconnecting the water supply lines. A flashlight comes in handy for seeing in those dark, cramped spaces under the sink. And a towel? It's great for catching any drips or spills during the removal process.
Shutting Off Water Supply
Before you start unscrewing anything, it's essential to shut off the water supply to your kitchen faucet. Locate the hot and cold water lines under your sink and turn the valves clockwise until they stop. This prevents any unwanted leaks or flooding during the removal process.
After turning off the valves, turn on your faucet to release any remaining water in the lines and double-check that the water is fully shut off. Once the water stops flowing, you're ready to start removing the faucet.
Disconnecting Water Supply Lines

With your water supply shut off and tools gathered, it's time to start disconnecting the supply lines from your kitchen faucet. This step is crucial for leak-free removal.
Locate the supply lines connecting the faucet to the shut-off valves. These are typically flexible tubes or rigid chromed copper tubes. Using your adjustable wrench, loosen the nuts connecting the lines to the faucet tailpieces. Have your towel handy to catch any residual water that may drip out.
If your supply lines are older, consider replacing them with new ones when installing your replacement faucet. Over time, these lines can wear down and become prone to leaks, so starting fresh is often the best approach.
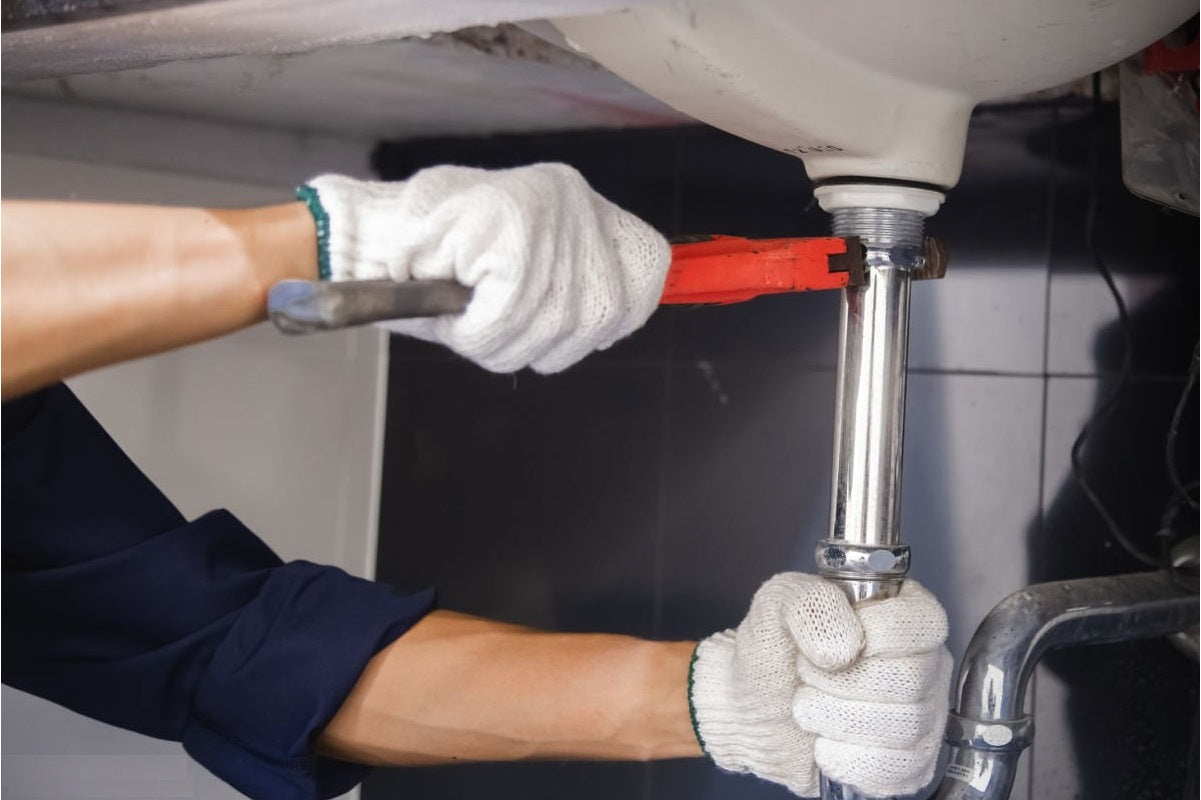
Removing The Kitchen Faucet Mounting Hardware

With the water supply disconnected, it's time to tackle the mounting hardware holding your faucet in place. This is where your basin wrench comes in handy.
Reach up behind the sink with your basin wrench and locate the mounting nuts securing the faucet tailpieces to the sink or countertop. Turn the nuts counterclockwise to loosen them, then unscrew them completely to release the faucet.
If space is tight and you're having trouble reaching the nuts, you may need to remove the supply lines from the faucet tailpieces first to give yourself more room to work. A little patience and persistence will usually do the trick in freeing those stubborn mounting nuts.
Handling Additional Faucet Components
Depending on your faucet style, there may be additional components to remove, like a sprayer or soap dispenser. These usually have their mounting hardware that needs to be addressed.
Dealing with Pull-Out Sprayers
If your faucet has a pull-out sprayer, you'll need to disconnect it before fully removing the faucet body. Most pull-out sprayers are connected to the faucet body via a hose that runs through the faucet's spout.
Locate where the sprayer hose connects to the faucet body under the sink. There's usually a clip or mounting bracket holding it in place. Carefully release the clip or bracket, then gently pull the hose through the faucet spout to remove it. Be careful not to damage the hose during this process, especially if you plan on reusing the sprayer with your new faucet.
Cleaning and Inspecting Sink Area Post-Removal

With your old faucet removed, take a moment to clean up the sink area before installing the new one. Use a putty knife or razor blade to remove any old caulk or grime around the faucet holes. Give the area a good wipe-down with a cleaning solution to start fresh.
This is also a good opportunity to inspect the sink and surrounding area for any damage or issues that need to be addressed before putting in your new faucet. Check for cracks in the sink, loose mounting hardware, or signs of water damage. Catching and fixing these issues now will save you headaches down the line.
Choosing Your New Kitchen Faucet

Now for the fun part - selecting your new kitchen faucet. With so many styles and features available, it's easy to get overwhelmed. But don't worry, we've got you covered with some key considerations.
Considering Faucet Styles and Features
Start by thinking about your kitchen's overall style and how you want your new faucet to fit into that aesthetic. Are you going for a sleek, modern look or something more traditional? Do you want a single-handle or double-handle design?
Next, consider the features that are most important to you. Maybe you're looking for a high-arc spout for more clearance when washing big pots and pans. Or perhaps a pull-down sprayer is a must-have for your cleaning needs. Touch-activated or motion-sensor faucets are also popular options for added convenience.
Don't forget to consider the finish as well. Stainless steel, chrome, and brushed nickel are classic choices that complement a variety of kitchen styles. But if you want to make a statement, go for a trendy finish like matte black or champagne bronze.
Installation Tips for Your New Faucet
With your new faucet selected, it's time to install it. While the specific installation process will vary depending on your faucet model, there are some general tips to keep in mind for a successful installation.
Securing The New Faucet Properly
Proper installation is key to ensuring your new faucet functions correctly and doesn't develop leaks over time. Start by carefully reading through the manufacturer's installation instructions. Gather all the necessary tools and parts before beginning.
When securing the faucet, make sure the mounting hardware is tightened correctly - not too loose, but not so tight that it damages the sink or faucet. Double-check that the faucet is centered and straight before fully tightening the mounting nuts.
Pay close attention to the connections between the water supply lines and the faucet. Make sure they're securely tightened and not cross-threaded. Turn the water supply back on and check for any leaks around the base of the faucet or under the sink. If you spot any, gently tighten the connections until the leaking stops.
Maintaining Your Kitchen Faucet Over Time
Congratulations, you've installed your new kitchen faucet. But the work doesn't stop there. To keep your faucet looking and functioning its best for years to come, regular maintenance is key.
Regular Cleaning and Inspection
To keep your faucet sparkling, give it a quick wipe-down daily and a more thorough cleaning weekly. Avoid abrasive cleaners or scouring pads that can scratch the finish. Instead, use a soft cloth and a mild cleaning solution.
During your weekly cleaning, take a moment to inspect the faucet for any signs of wear or damage. Check for leaks around the base or under the sink. Make sure the handles are secure and the spout is rotating smoothly. If you notice any issues, address them promptly to prevent bigger problems down the line.
With regular TLC, your new kitchen faucet will continue to be a functional and stylish centerpiece in your kitchen for years to come.
Conclusion
And there we have it – everything needed for removing that stubborn kitchen fixture has been laid out. From shutting off water supply lines and unscrewing those pesky mounting nuts to finally freeing up space for something shiny and new, who knew all this could be so straightforward? Remembering these steps not only saves you from potential plumbing disasters but also empowers your inner DIY enthusiast. So next time someone asks about how to remove a kitchen faucet, share your newfound knowledge and maybe even lend them a helping hand!